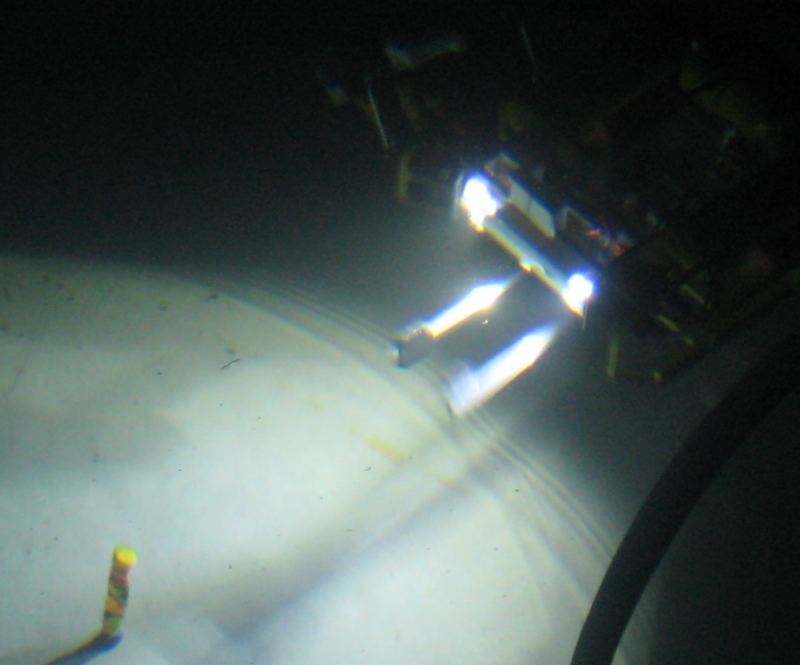
6/6/2009
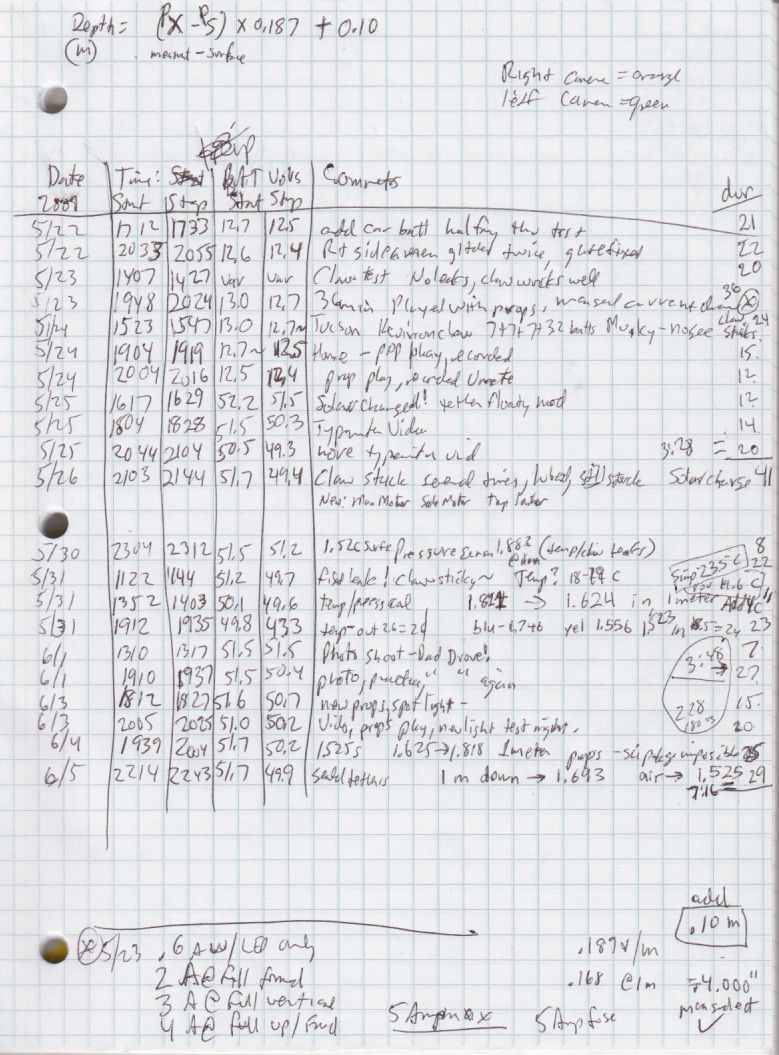
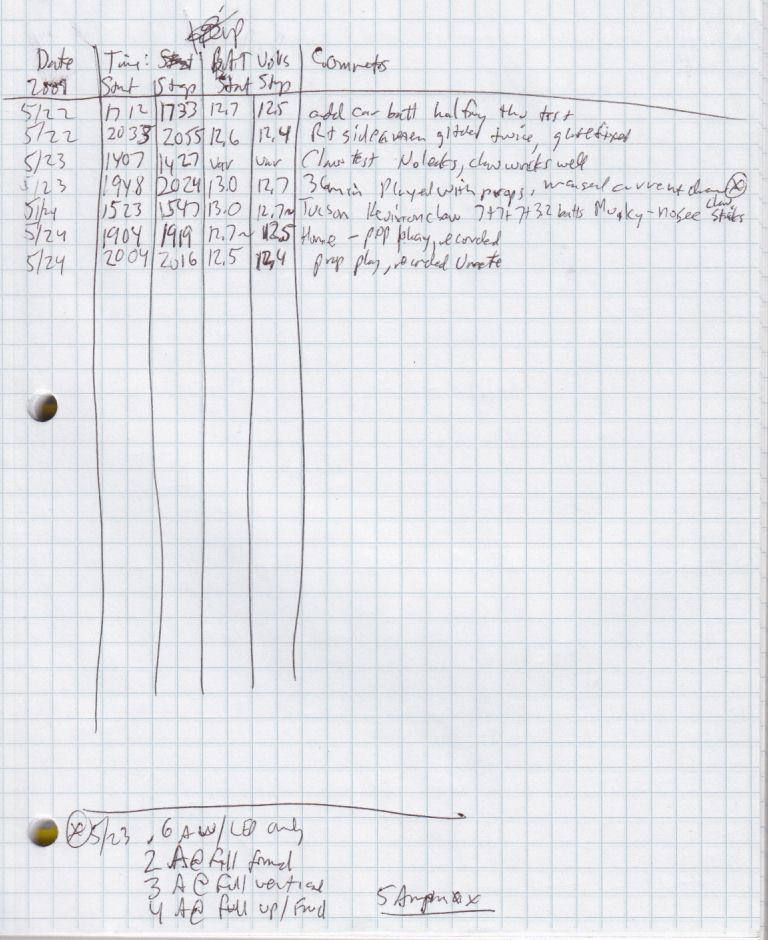
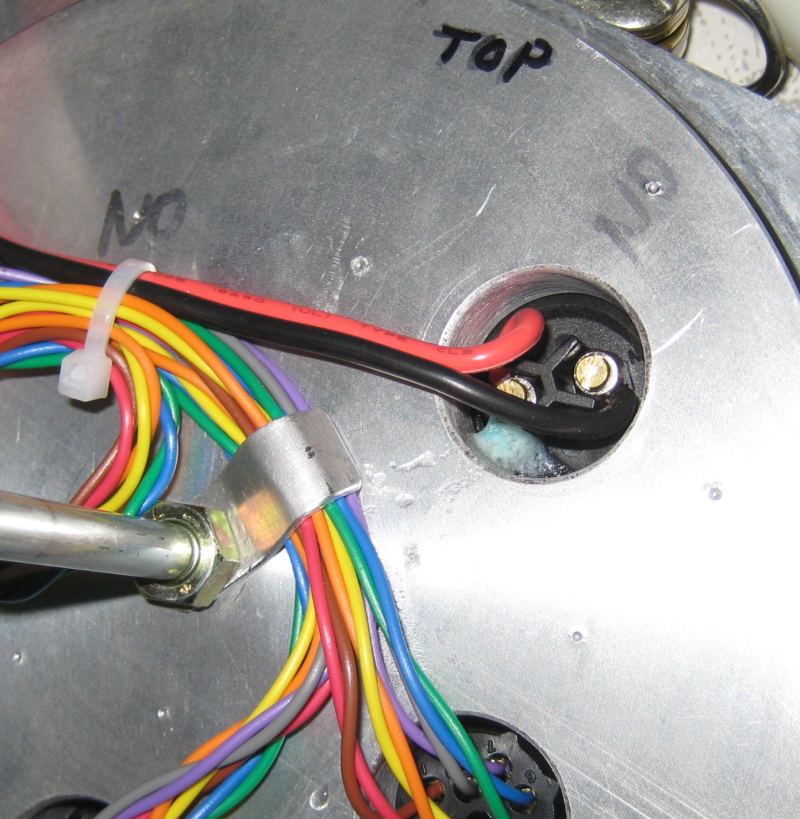
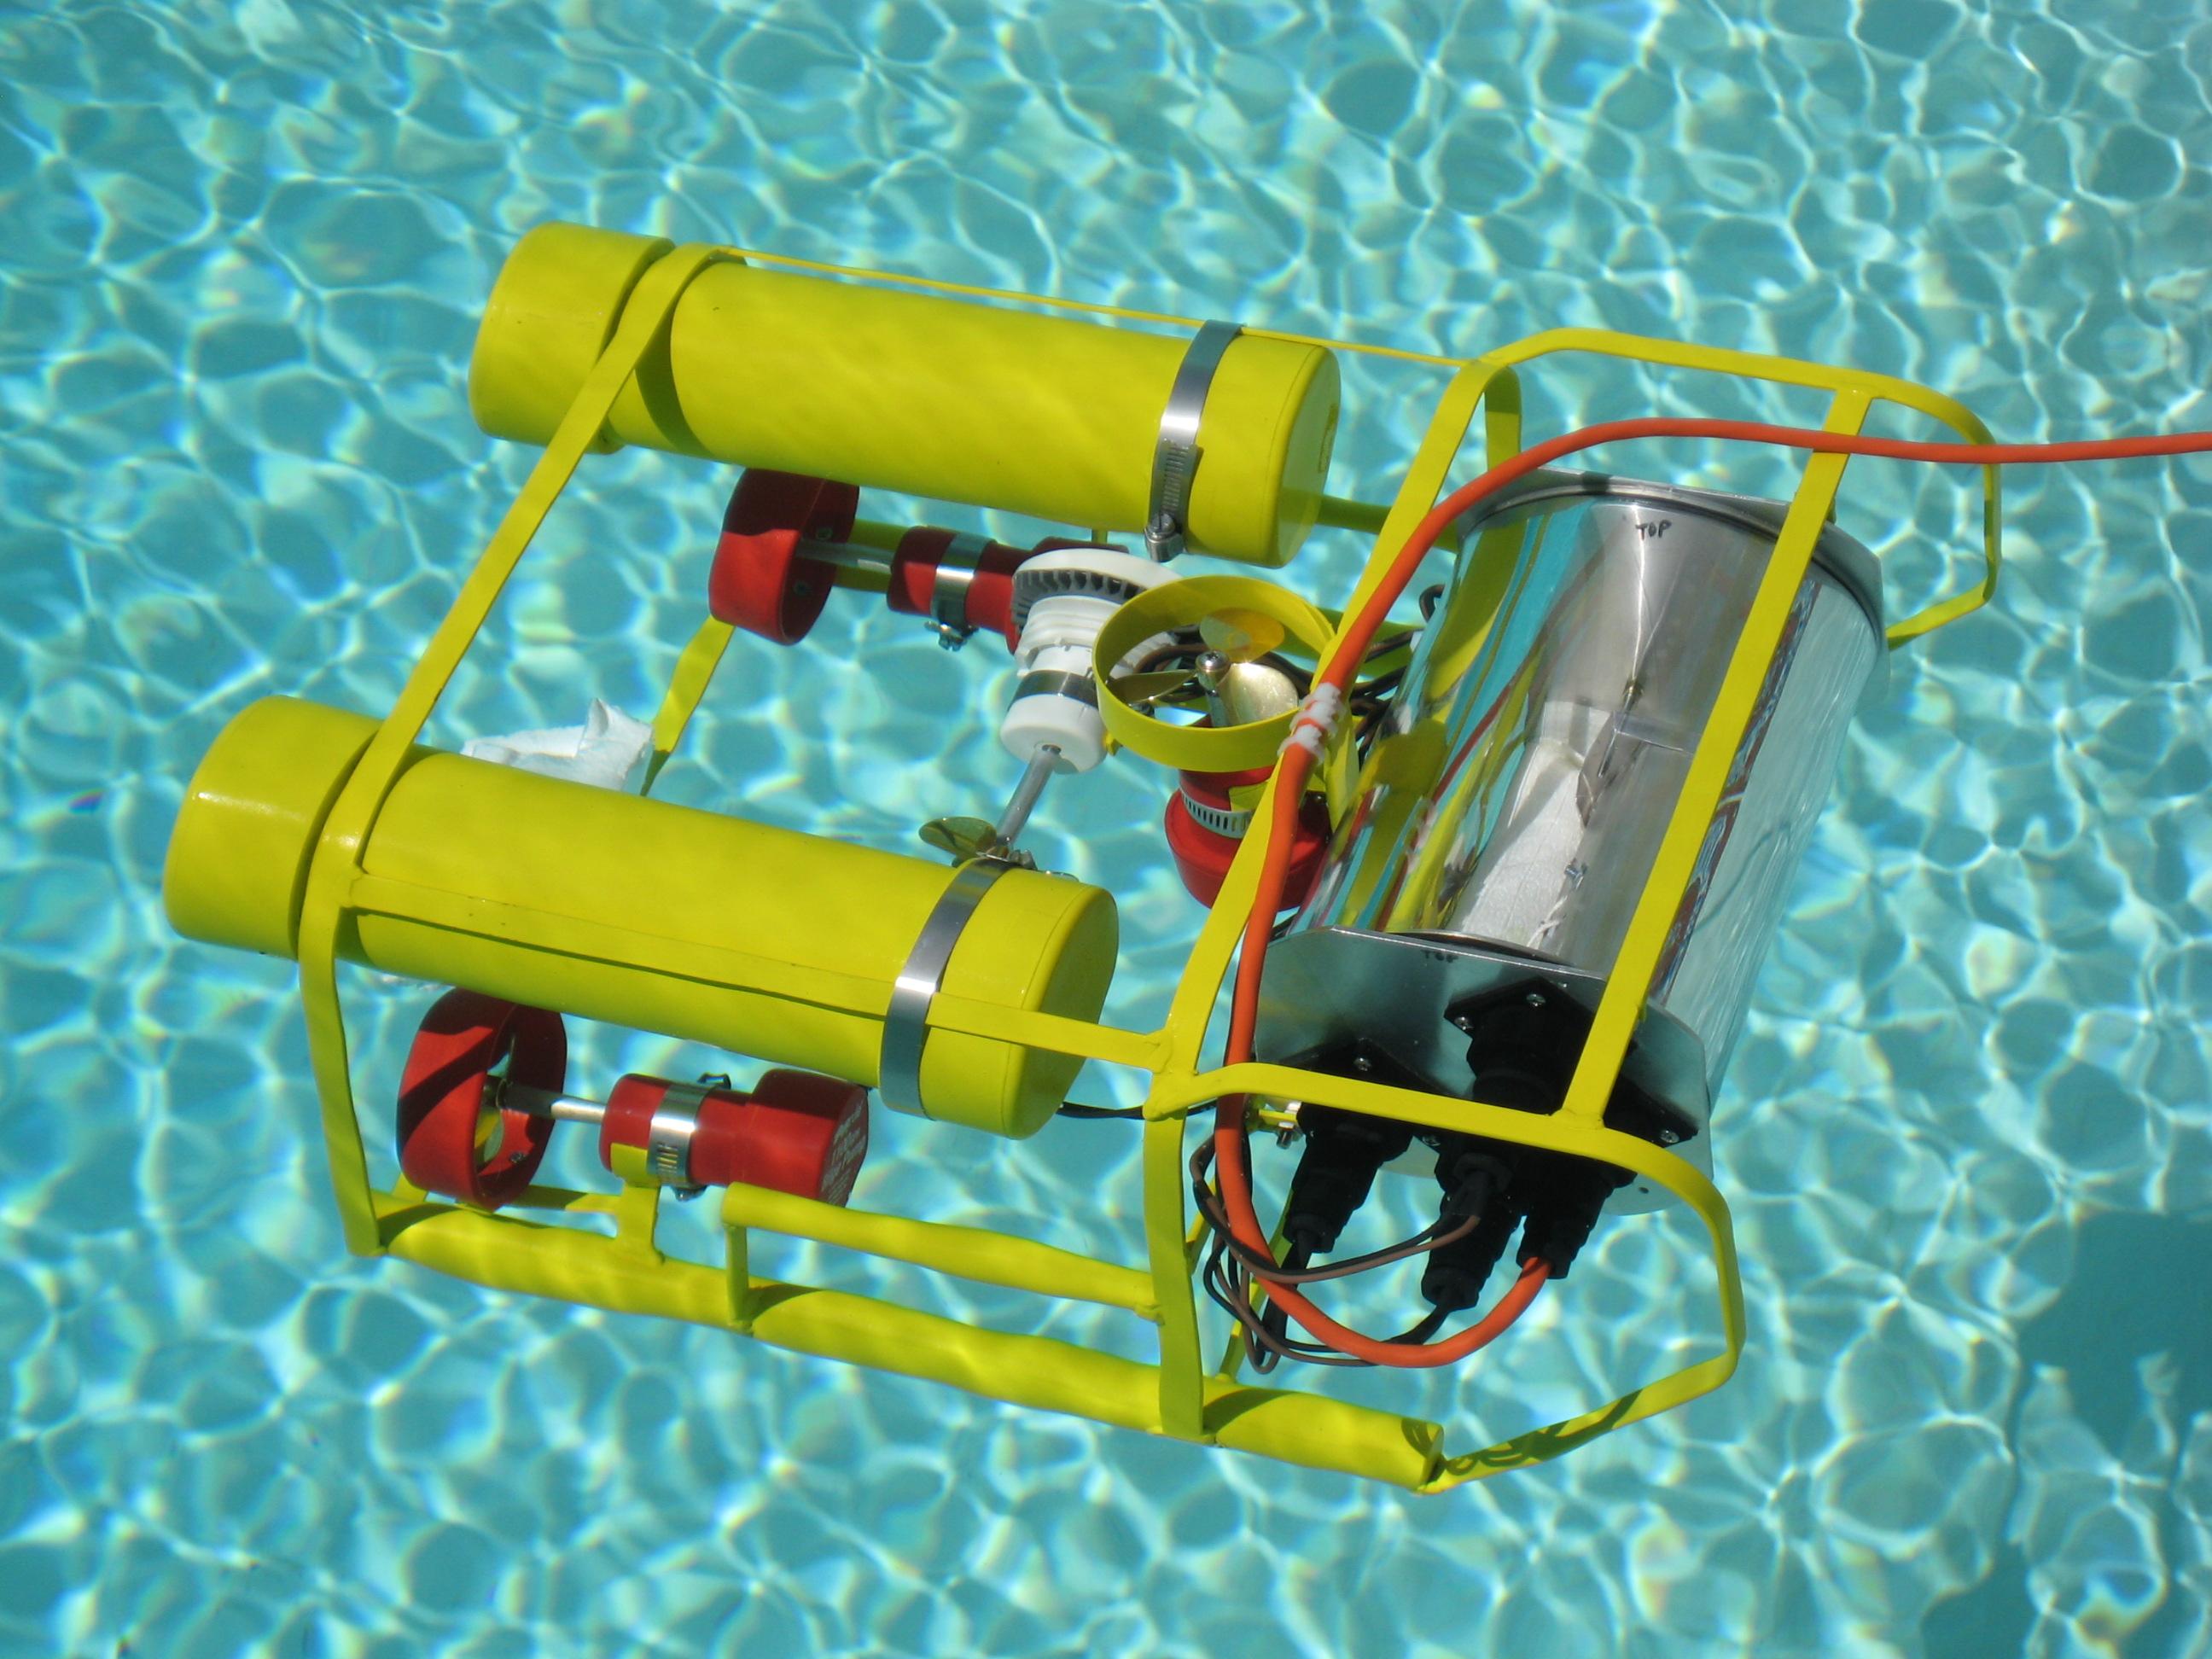
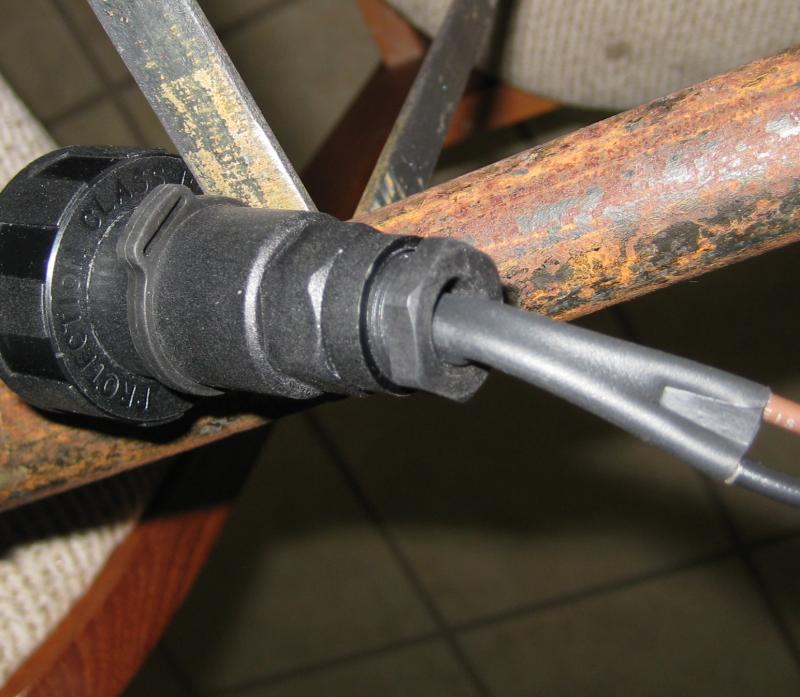
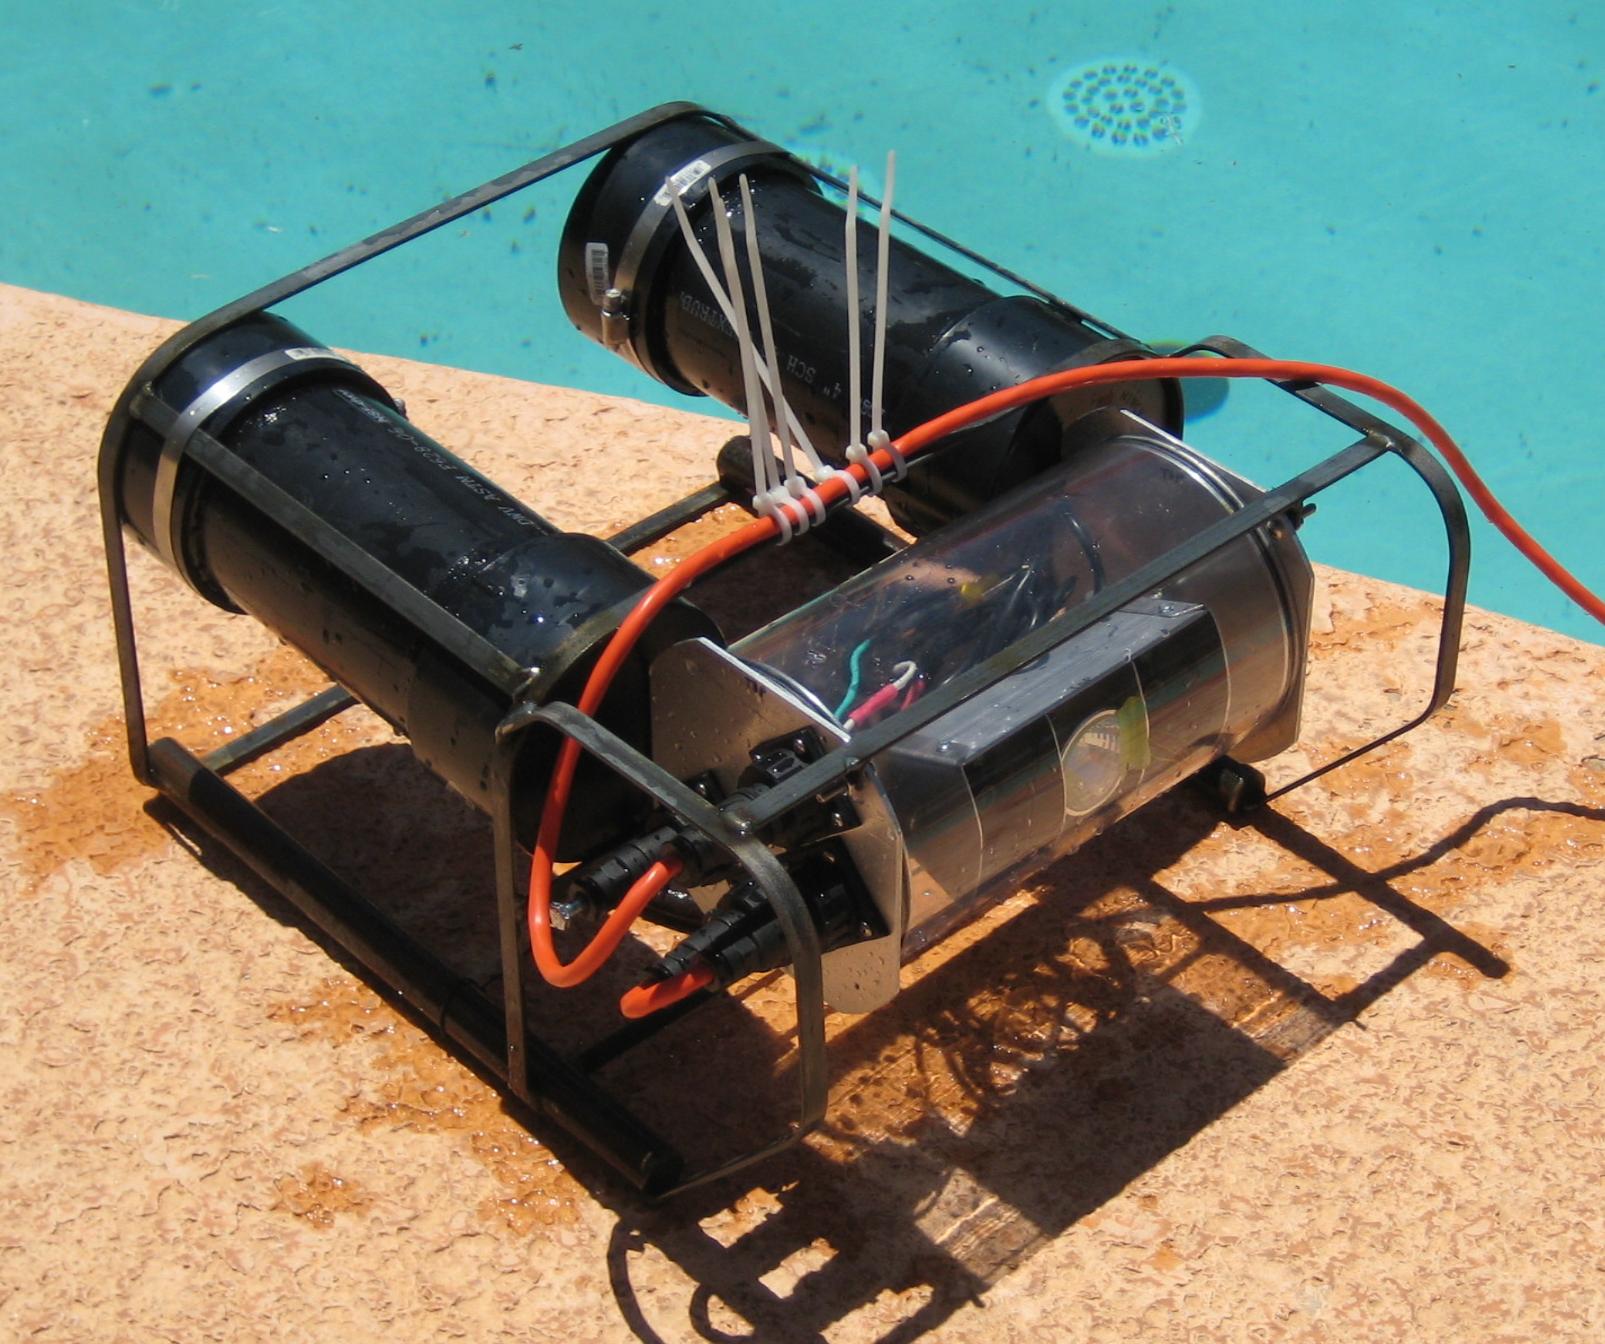
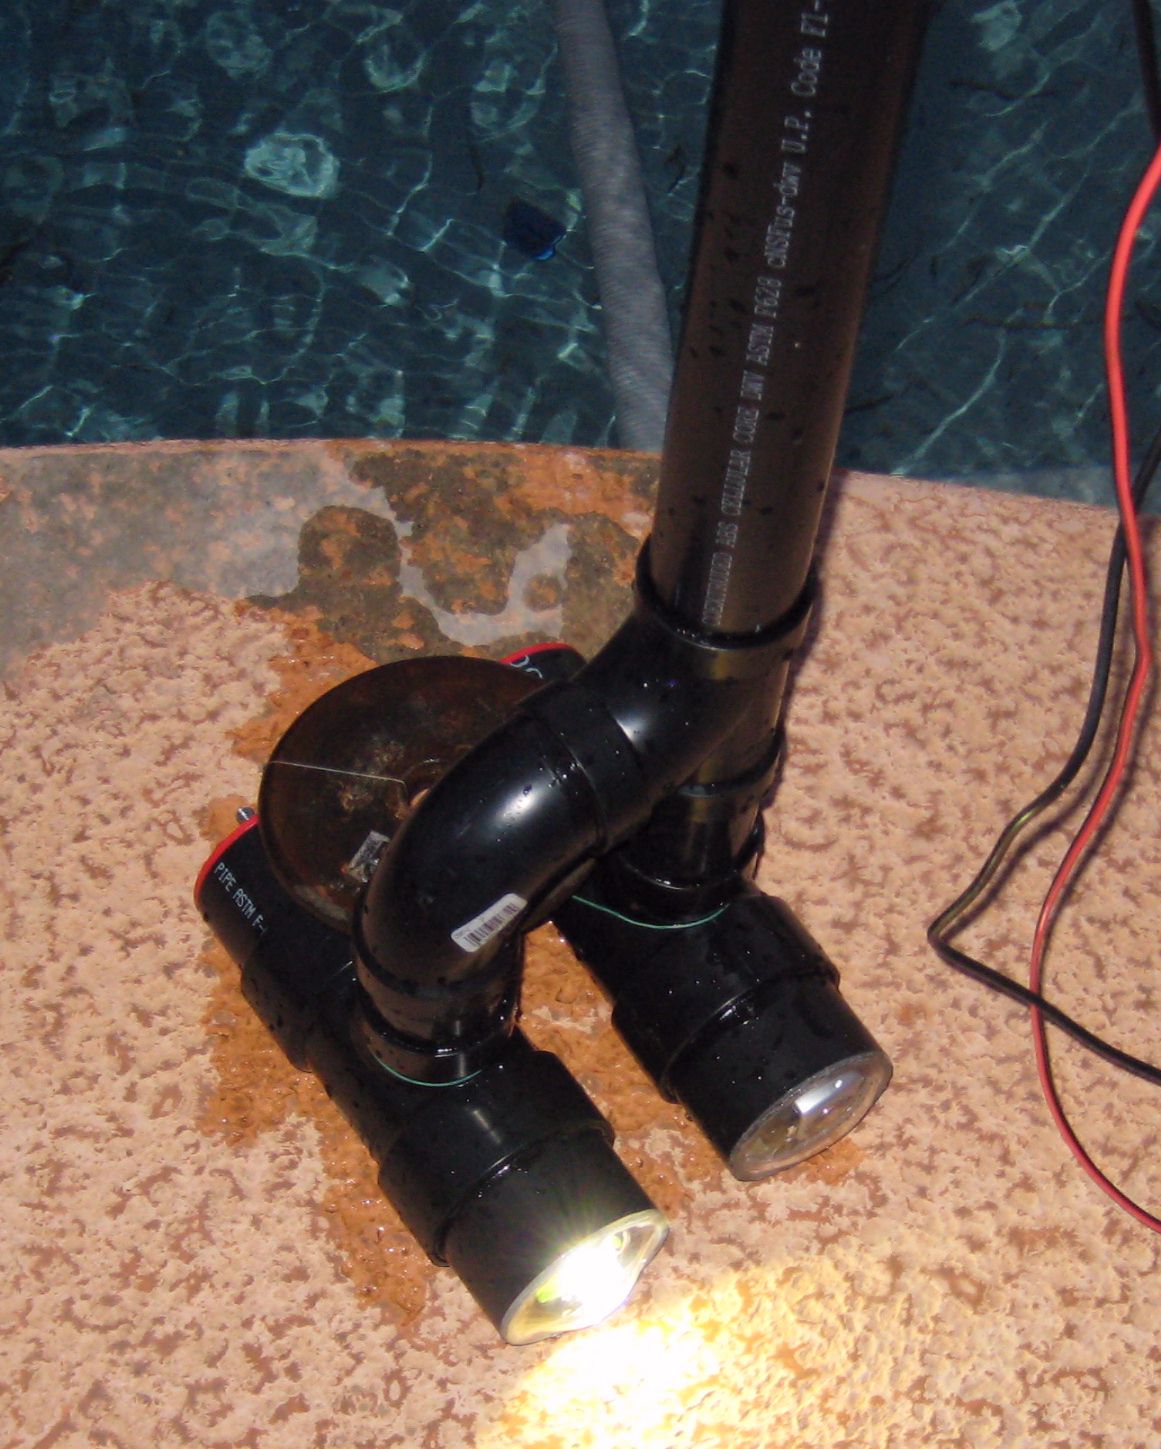
Testing has been going on all this time. Things have been going ok for the most part. The latest test log is pictured above, and shows we've had notBob in the water for over seven hours! We changed the halogen light to a narrow beam spotlight (10 degree FTB bulb), and it shines a bit further, although we need to aim it better. We had a leak in the power cable, but I noticed it before water entered the SCULL, it was only to the connector. I expoxied the wires into the cable jacket, and that fixed it. I also expoxied the connector ends of the tether cable, just to be safe. We've also be testing the Hello Kitty Command Console, and it seems to work well. It's easy to set up and get the robot going. David got back from his vacation, so we'll plan on getting together with him either here or at a pool in Tucson so we can all get used to setting up and runnig the system. I asked him to work on a better temperature measurement system too, since the one we have seems to be flaky (disagrees with a known good temperature gage at times). We calibrated the depth gage, and came up with a simple equation to calculate depth from two pressure readings--one in air and the other at the desired mark in the pool:
Pd and Ps are the voltage readings of the pressure gage, and D is given in meters. The constant 0.10 is the depth of the reference line on the claw, relative to the pressure sensor.
5/25/2009
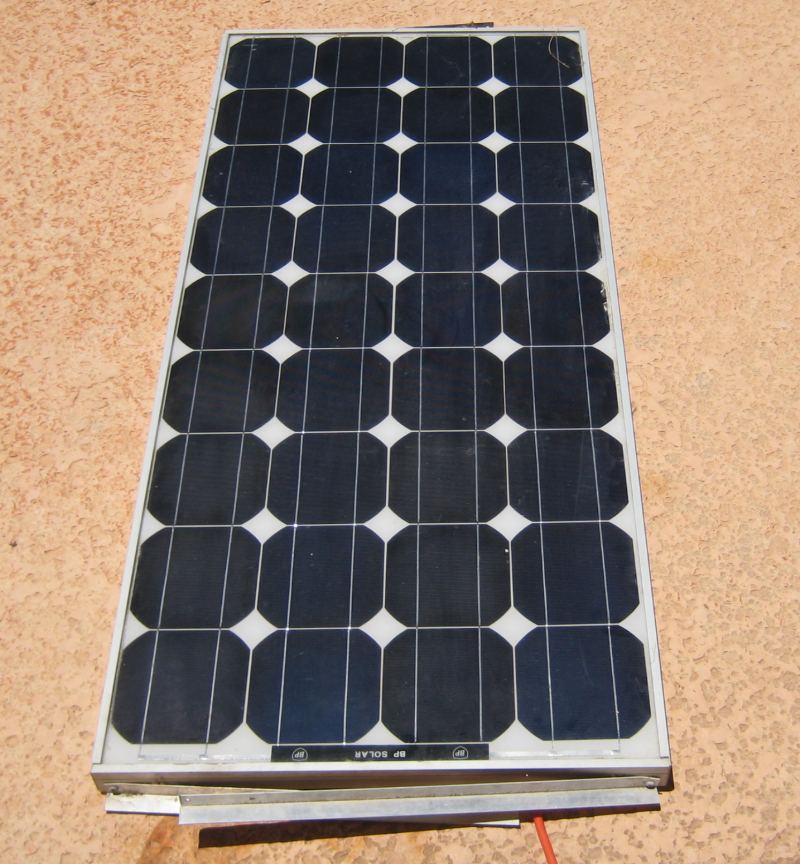
Today I played with the solar charging system. David has a 75 watt BP Solar panel, which he uses at the Burning Man festival. Since we can get bonus points for using non-grid power for the ROV at the competition, he offered to use it for the NURC. He also has a 10 amp solar converter/charger unit, which is designed to charge lead-acid batteries from the solar panel. It was nice and sunny today, so I connected the four batteries we used yesterday to the charger, connected the panel to the charger, and let it "cook". After a couple hours, the batteries were fully charged.

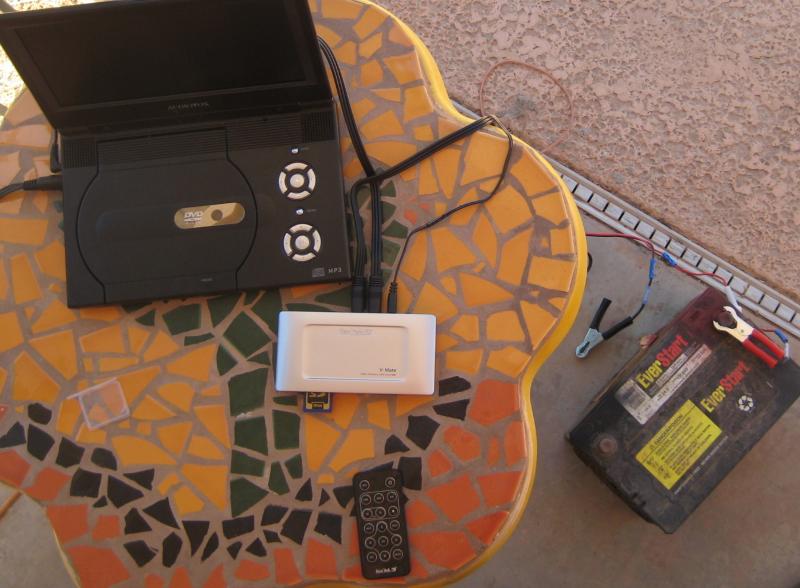
This is the charging setup, the converter is pretty small. It limits
the charging voltage to 14.10 volts, and current is limited to what the
solar panel can put out, which is about 5 amps. Of course, I made a video.
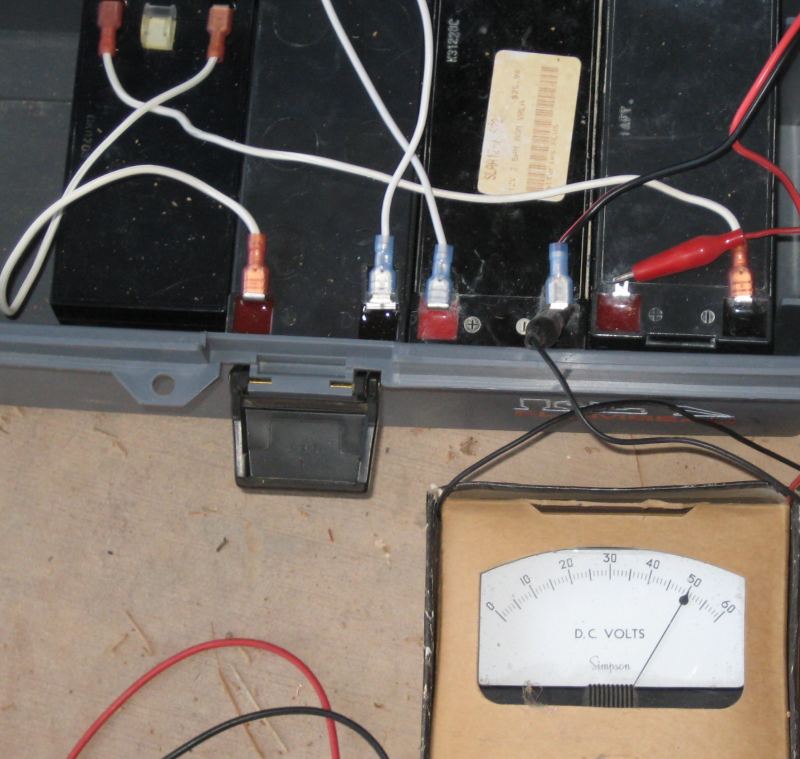
I also connected an old analog voltmeter to the batteries, so we can see the total voltage going to the ROV.
5/24/2009
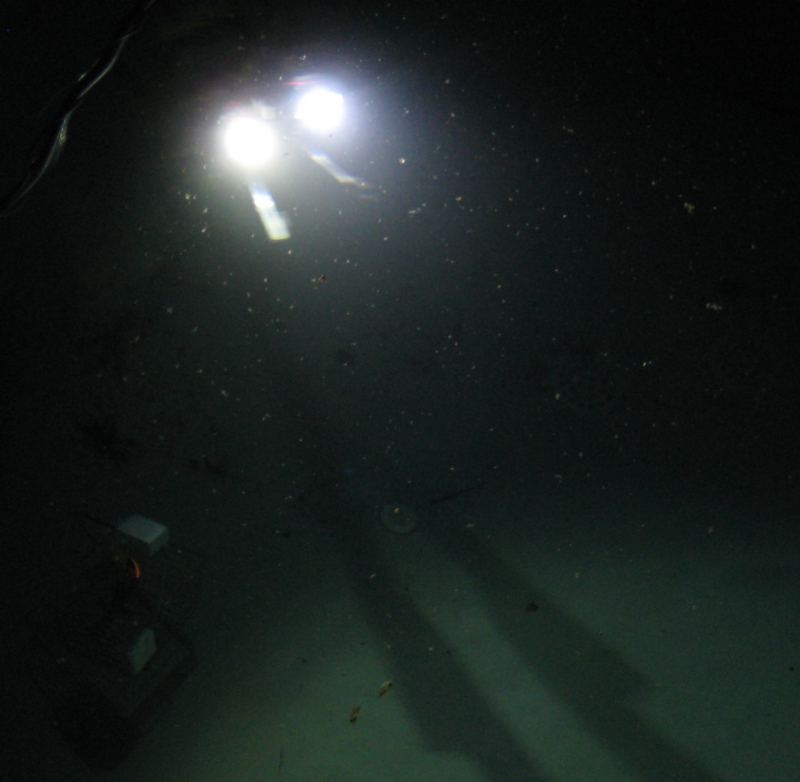
More testing today, we got in three sessions. The first was at a relative's pool in Tucson, during the afternoon, in murky water. The next was at the end of the day here at home at the neighbor's pool, and another after it got completely dark. Steve is working on a video. The tests went fine, and added up to almost an hour of running time. Here is the log so far.
We are getting familar with Bob, learning what he can and cannot do, and how to use the claw, driving, and vision systems effectively. We are also getting a good feel for battery life, which is far better than we expected. I was investingating batteries, and found that the size we need is used in back up power supplies for computers...then realized we have two backups here. I took the batteries out of them, one is the same as the 7 Ah batteries that David had, the other is smaller, 3.2 Ah. They are kind of old, but still work ok. The larger one does not hold as high a charge as the small one, but seems to discharge about the same as David's (one of which is older than the other). The small one seems to be in good condition, and is holding up ok. After the three test sessions today, the four batteries ended up at about the same voltage, although the started out differently. David's started at about 13.0 volts, my older one was a bit less, my newer one was a bit more. It doesn't seem to matter too much at this point, though. It looks like any four of the five batteries we have will work fine for completing the half hour mission.
We also need to play with the solar panel to see how the batteries charge. I'll try to work on that tomorrow, since they are about half discharged now. The plan is to have them discharged about that far before the competition, then charge them with the solar panel, run the mission, and have them come out with more voltage than they started with before the solar charging. That should get us the full bonus score.
5/23/2009
Yesterday we tested Bob and everything seemed to work well. The lights, thrusters, and camera servo all performed just fine, and there were no water leaks. We also started a log book noting the start and stop time of each test session, and the average battery voltage before and after, and a few comments. Getting the claw on the robot today allowed us to have even more fun testing. The claw seems to work well for everything we tried to do with it, including picking up a basket, retrieving dive sticks, glow sticks, and even the PVC frame we made to hang "samples" on (and I got a short video of that). We also tested the current draw of the ROV at 48v nominal operating voltage, and found it draws about half an amp with the LEDs on, and one amp with the halogen light on also. With the forward thrusters going all out it draws about two amps, and with the vertical thruster only, at full power, it's about three amps. Going up and full forward with the halogen light on will take about five amps, which seems to be the maximum current draw. That's only about 250 Watts! We were surprised, especially considering how capable the robot is.
5/20/2009
With the electronics done, it was time for some testing. First we tried out the lights and servo, found a wiring problem with the second vEx controller tether wiring and fixed it, so the lights and boat servo all work, and we have video. The system is running on the three 12v batteries that David had from previos projects, so it has 36 volts power instead of the design 48v. It is designed to work on anything from about 24v to 48v, so this is not a problem. We visited the pool, and after making sure the SCULL was not leaking, put Bob in! A quick drive around showed that the systems were working, so we connected the Vmate recorder to one camera, and used the other for navigating. This video is with Steve driving, not watching the ROV, only using the monitor view from the video camera. After ten minutes, we noted that the ROV was still driving well, the batteries had dropped voltage a bit (0.1 to 0.2v). We did find a bit of water in the SCULL, and it was traced to the battery power cable, it is not sealing completely at the connector.
We still have to fix the tether, then we'll try it out at night, and see how the lights work. Steve commented that the robot drives well, strafing is a nice feature, and the tilting camera is great for seeing where you are.
Later that night....we fixed the power connector so it would not leak, and took the ROV back to the pool. This time we could test the lighting at night, and it happened to be raining too. The LEDs work great!

The halogen light works well too, but not as much difference between it and the LEDs as we expected. It also has a lot of glare on the left camera.

This is not really a problem if the halogen light is used only to find stuff that's far away, which was the original intent. It would be a problem for seeing stuff in 3d, but we could add some felt or something to block the glare, too. Overall, the test was a success. We did find a small amount of water in the SCULL after it spent about 15-20 minutes in the pool, and it appears to be coming from a motor connector. We will probably fix the motor connectors the same way we fixed the power connector, which was to add a piece of round 3 conductor extension cord, and splice it to the two conductor cord with the Y heat shrink trick. The round cable seems to be able to seal at the gland better than the heat shrink covered wires do.
5/13/2009
We did some quick testing with stereoscopic vision. We got some impetus to use stereo from Carl Hayden's robotics team, who has set up a 3D viewing box with two monitors, a teleprompter beam splitter, and polarized glasses, along with some fancy image processing stuff in a powerful computer. I got to try the system when in Atlanta for the FIRST Championships, and it looks great. I've heard that they are working on building a bigger version of it, and that it might be avaialble for teams to use at the NURC this year. If so, and we can just plug in two video signals to it, that would be great! But it would be nice to practice with some type of stereo vision system ahead of time, to get the hang of operating the ROV with it, and also to have our own back up system in case we can't get the other one to work. One way to "fake" it is to have two displays next to each other, with the right side one connected to the left camera, and vice versa. The viewer lets his eyes cross so they focus on the opposite screen, and it gives the appearance of a single, 3d view.
Steve and I did some experimenting yesterday, using two small displays (DVD players with external video inputs), notice the camera mount is hiding on the floor just below his left elbow.

Steve was able to get the 3d effect, even though the two displays we have are different sizes, and have some other differences. We later moved one of the cameras so that it is the same distance from the other as his eyes are apart from each other, and it seemed to work well. We did not go back and test with them further apart (about 50% further apart than his eyes) as in the original design, with the 50mm light beween the cameras. We need to do some more testing, including in water, to see if the camera mounting affects his ability to see 3d well.
I painted the ROV frame yesterday, and played with the floatation, and decided we need to get everything else done before worrying too much about it. I did make a small tank with two petcocks to adjust bouyancy, but it will probably have to be redone once we figure out just how heavy everything is. I added another video too, just because it's so fun.
I let it sit in the pool for a while and it's still not leaking. That's a good sign.
5/11/2009
More testing today. I played with the connectors and the motor wires, and on the second try, I got it to work. The glue inside the heat shrink was not adhering to the wires, and looked glossy, so I roughed up the wires with 600 grit sandpaper, and tried again, making sure to get the tubing nice and hot with the heat gun, so I could see the adhesive flowing out, before pinching the web between the wires with pliers. Since I could get it to not leak, I decided to put power to the thrusters, and see how the robot moves. I even took some video. It seems to go about two thirds of a meter per second, with the motors running at half voltage (12v powering both motors in series).
I also mounted the vertical thruster motor, and tested it, and again there's video. We need to figure out just how much the robot will weigh....for this test, I added a one kg weight to the bottom of the robot, and it sank reasonably fast. Total robot weight as it was in this video was just under 10 kg. With the extra stuff that we still have to add, it will probably be just over 10kg (without that weight).
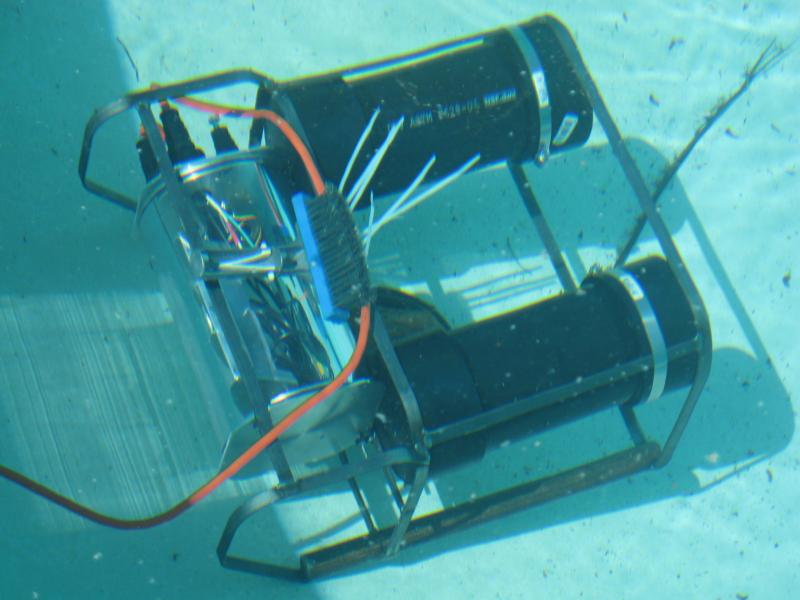
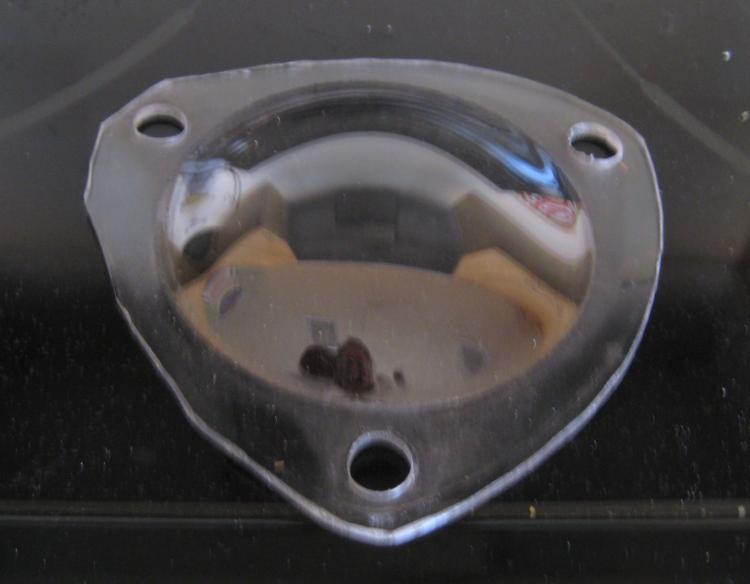
Here is notBob after pulling him out of the water after the vertical thruster test
I need to decide where and how to mount the side thruster, and work on the manipulator. I did start on the bill of materials, it has a ways to go yet.
I also did a bit more research on O ring lubricants, EPDM rubber, etc and decided to try Sil-Glyde lubricant on the O rings. So far it's working great, it's easier to assemble and disassemble the SCULL.
5/10/2009
The result of the thruster mounting today, ready for some cable/connector testing

which didn't work out so well, the motor cable leaked where it enters the connector.
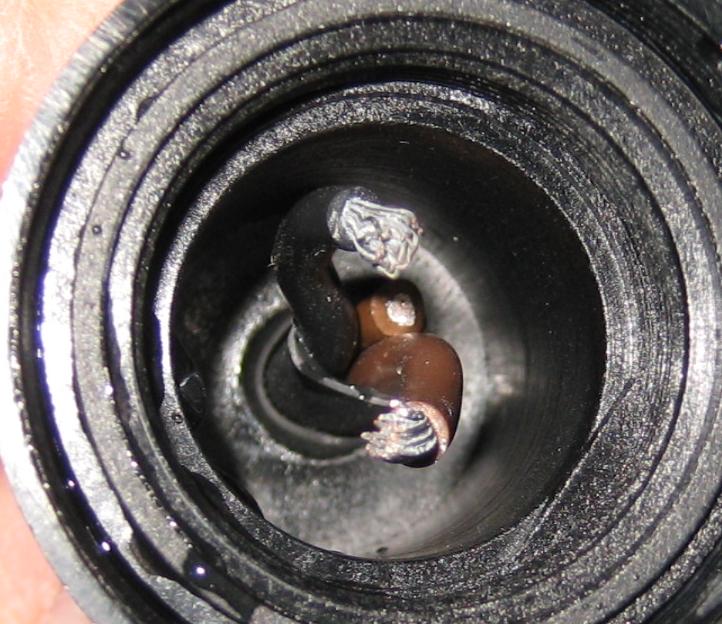
It looks like it's leaking from inside the heat shrink tubing. I tried a fun technique without reading up on it first....
5/8/2009
Steve came to visit for a couple days, and got to play with the ROV and see how the camera/light work at night. He thinks it will be OK. He did some testing to see how much force it takes to move the robot around, and was satisfied that it will move pretty well with the current thruster design. We used the fish scale attached to the tether to find the velocity with a specific pull force, but didn't record results, it was more a qualitative thing.
5/6/2009
Later that night....I did some more testing after it got dark. Light...oh light....it's kind of hard to see stuff in the pool at night, mainly because there isn't anything there to see. Here's a video of the robot sitting on the ledge in the deep end, looking across to the shallow end, then moving to show across to the other side of the deep end. The camera and light unit is aimed down a bit below horizontal.
I wonder if we need some props to find, or more light to see the neat features of the pool at night? I might get a couple different MR16 bulbs to try.
Since the SCULL appears to keep water out, I decided to connect the camera and light, and try it underwater. The robot does not have any thrusters and the gimbal servo is not connected, and only one camera is connected. The LEDs are not installed yet, but the halogen light is working. I did some daytime tests first, letting the robot sit underwater in the deep end of the pool for a while to make sure it would not leak, before applying power. The pool brush is there to provide some extra weight, as the robot is a bit underweight for it's bouyancy, and I wanted it to be slightly negatively bouyant.
All looked good, so I connected power to it, and recorded some video. After playing back the video I noticed the interference, which seems to be caused by the power wiring and the power supply (a switched "battery eliminator" hobbico unit). I dragged a car battery over to the pool to try it with clean power, and it worked better.
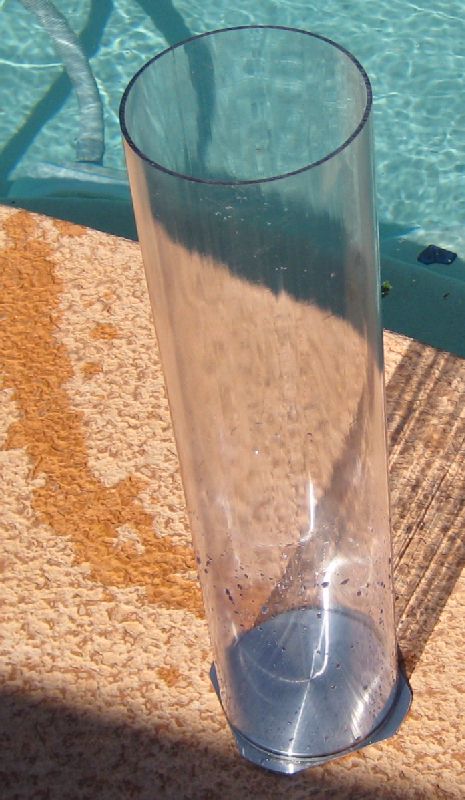
I consider the tests to be successful, demonstrating that the polycarbonate tube provides a suitable way to see underwater. Testing at night will show how well the light works at longer distances. The robot after removing it from the pool:
And the testing setup for recording video, and powering the robot camera and light:
5/3/2009
I added some more parts to the frame this morning, then went to Tucson to visit David and later Steve. We played with motors and propellers and switching power supplies, and concluded that our original plan to use a brass model boat prop, with an ABS nozzle, is a good way to go. We tried a PC cooling fan prop, and a cut down airplane prop, neither of them performed very well. Also the boat prop provided about 30% more thrust with the nozzle than without.
We also put the frame and two flotation tanks into the bathtub, and it was slightly bouyant, which we hoped for.
4/30/2009
We have been concerned about glare from the lights, affecting the cameras. I did a quick experiment to see how much of a problem it would be, by placing the light/camera assembly into the tube, and turning on the light and camera, in a dark room. This does not show what will happen with the LEDs on, or with the tube in water, but does seem to indicate that it will not be as serious a problem as I feared. With the mount assembly about two millimeters from the tube, there is very little glare. With it flush, there is none, and with it pulled away further than two mm, glare does become noticeable. Shown is the setup with the planned spacing, and a photo of the display showing that glare is negligible.
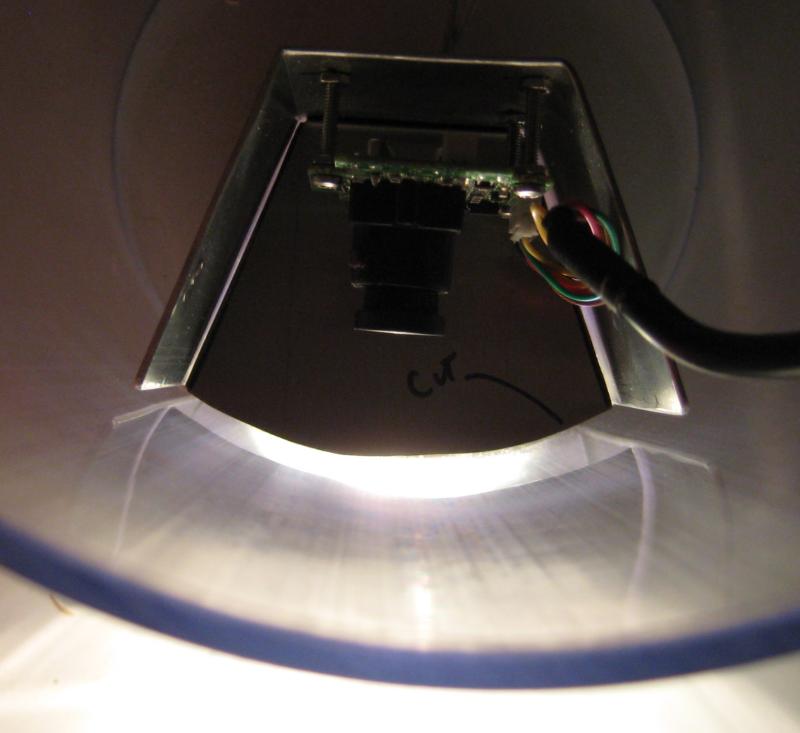

There is a slight bit of white showing at the right edge of the image, centered vertically, which is the glare.
4/24/2009
I did a quick test with the vEx transmitter for David, so he could see what the PWM pulse train looks like. This is the data connections at the tether port, one joystick is moved fully in one direction, I think it's channel 4?

The parts for the electronics enclosure arrived while we were in Atlanta. The polycarbonate tube doesn't look as nice as I hoped it would, there are wavy lines along it. I realized I could do a test of the enclosure, by putting the plug in place, and setting my small camera inside it, and putting it in the swimming pool.
I performed the test, and posted video on youtube. The optical quality does seem to be acceptable. I would like to repeat the test at night, perhaps using the camera/light test setup to provide light from the two lights I have set up for it.
4/12/2009
I got the 3 watt Luxeon LED from David yesterday, he mounted it on a heatsink, and connected a 5.6 Ohm resistor in series with it. I connected a long wire pair to it, so I could put it in the light/camera test setup for an underwater test in the pool. The video is on youtube, and like the previous test the recording was made using another camera looking at the monitor, so the video quality is not very representative of what the monitor actually looks like. The scene is very easy to see when the camera is within three to four feet of the subject, the light is very uniform, and the brightness is great for close up work, and it does not have the "spotlight" problem that the Halogen light has. It looks like it would probably work great to have a few of the LEDs mounted in fixed places in the Lexan tube camera housing, and have the camera and the Halogen floodlight pivot. The floodlight works great for long distances, as for searching and navigating, and it looks like the LED will work well for manipulation. We could switch the Halogen light off for close up work, and back on for navigation/search functions.
Now we need to work on a design for the camera and light mounts, so that they can pivot, and also prevent glare from the lights to appear in the camera.
3/18/2009
I was at the Los Angeles FRC regional for almost a week. But today Steve is here, and we made some motor testing progress. We bought two bilge pump motors at Walmart, a 500 gph and a 1200 gph, both Attwoods. The 2" and 3" propellers arrived in the mail while I was gone, the mid sized one was back ordered. Also, the 3W LEDs arrived, but I have not messed with them yet.
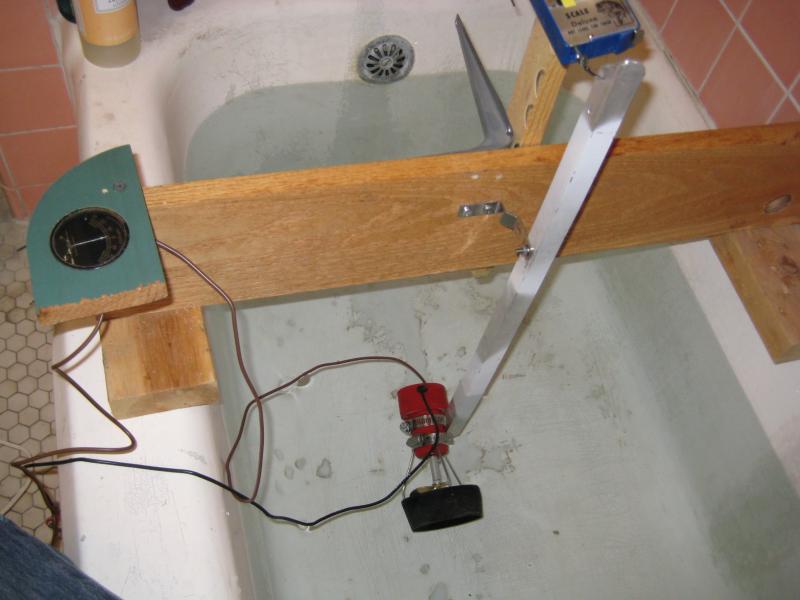
We set up a bollard test rig, using the laundry sink in the shop, some lumber, a piece of 3/4" x 1/16" aluminum angle, and a fish spring scale. Power comes from a normal 12v car battery.
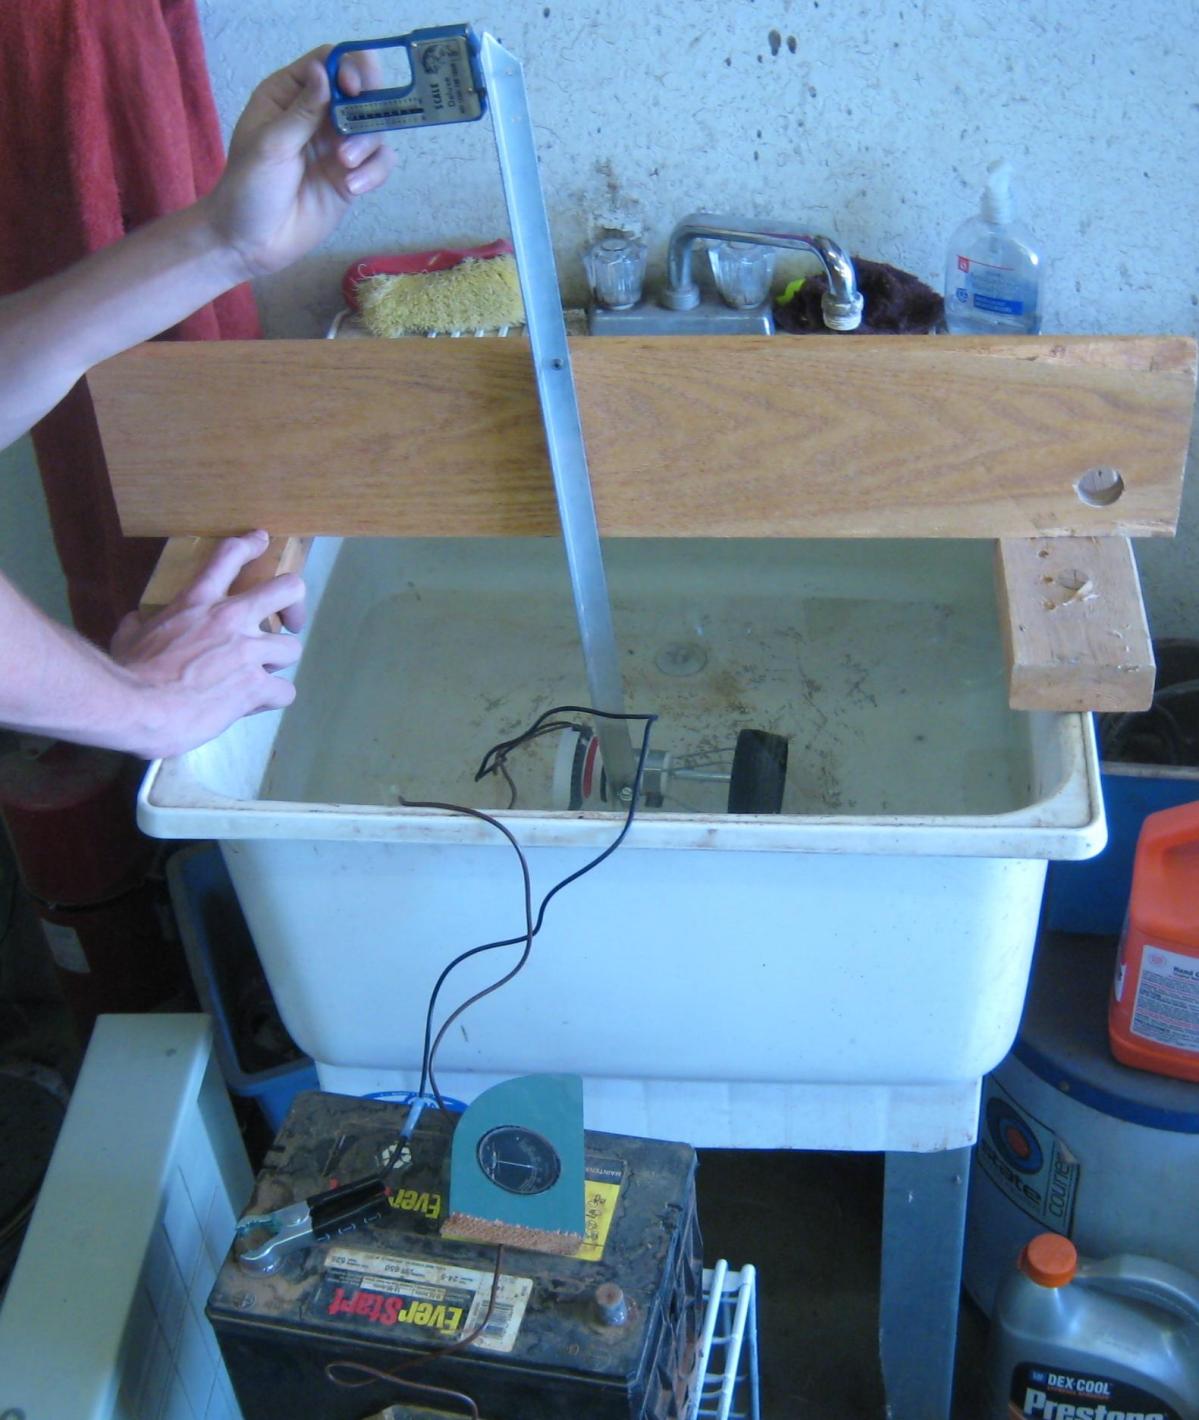
With the battery needing a charge, we ran a test with the 1200 motor and 3" prop, and it gave about one pound thrust, drawing about nine amps. We made a sort of Kort nozzle from a piece of 3" by 1.5" long ABS pipe, using the lathe to make it sort of like the proper airfoil shape, and attached it to the motor with 3/32" stainless wire and a hose clamp. We charged the battery before we ran this test. It produced almost three pounds thrust, and drew ten amps current. Video on youtube.
3/10/2009
Tested the Radio Shack camera and 20W MR16 flood light in the neighbor's pool tonight. Video on youtube.
3/8/2009
An idea for a camera and light testing rig...use those two 80mm polycarbonate domes I made and put them on some ABS Tees on the end of a long piece of smaller ABS pipe. One tee for the camera, one tee for the light. Put a plug the back of each that can be easily removed. I'll work on it...might be handy.
3/3/2009
Played with domes today. The consensus on the internet is that it's not too easy to make nice stuff from thermoforming polycarbonate, but that didn't scare me. I found some stuff in the shop that would help, including a 3" exhaust pipe flange, and a steel plate a bit bigger that I could use for the bottom.
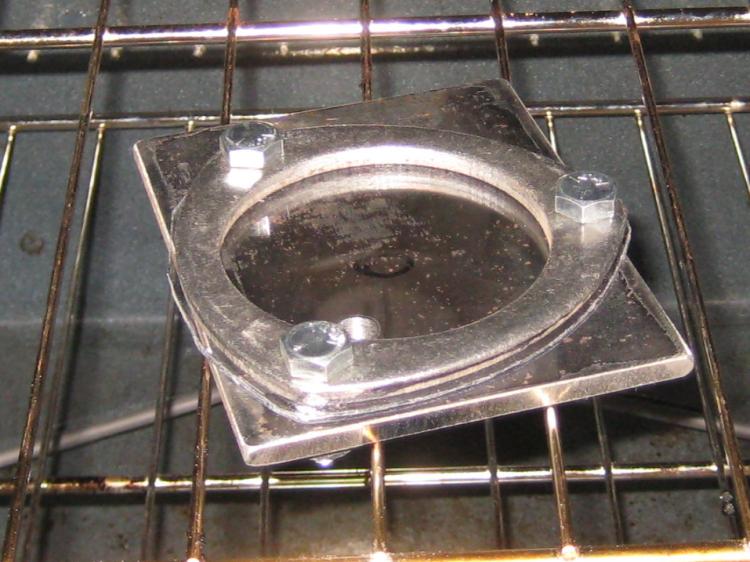
The kids had some Lexan left over from the little robot, it's about 3/32" thick, so I borrowed a bit (I'll repay Gary later, I promise) and drilled some holes in the steel plate and bolted it together and put it all in the oven. When it got up to 380 degrees I took it out and put some compressed air into the hole.

I guess I didn't blow air in it as long as I should have, because it didn't get as round as I wanted. But it might work, and I can try again too.
There are some imperfections, I think I need to add another flange between the plastic and the steel plate, and watch it closely to see when it starts to sag, then quickly blow a lot of air into it. I had about 15 psi in the air tank.
later that day: There is a video of the next attempt on youtube. It also shows the light I got at Lowe's on the way home from dinner. It's a GE 12v 50W halogen track light bulb, and it seems to do a lot of illuminating when I used it with my video camcorder. The lights are available in lower power ratings. I can't find any info on GE's web page about this item, but the 39 watt bulbs put out over 2000 lumens! I'll look into figuring out if it can be used directly in water, so it won't melt the hull or the wiring.